It’s Caribbean American Heritage Month, and there are festivals and celebrations going on all over the country! This month, I’ll have several quick videos to help you get your kids involved, and to represent their Caribbean heritage year round.
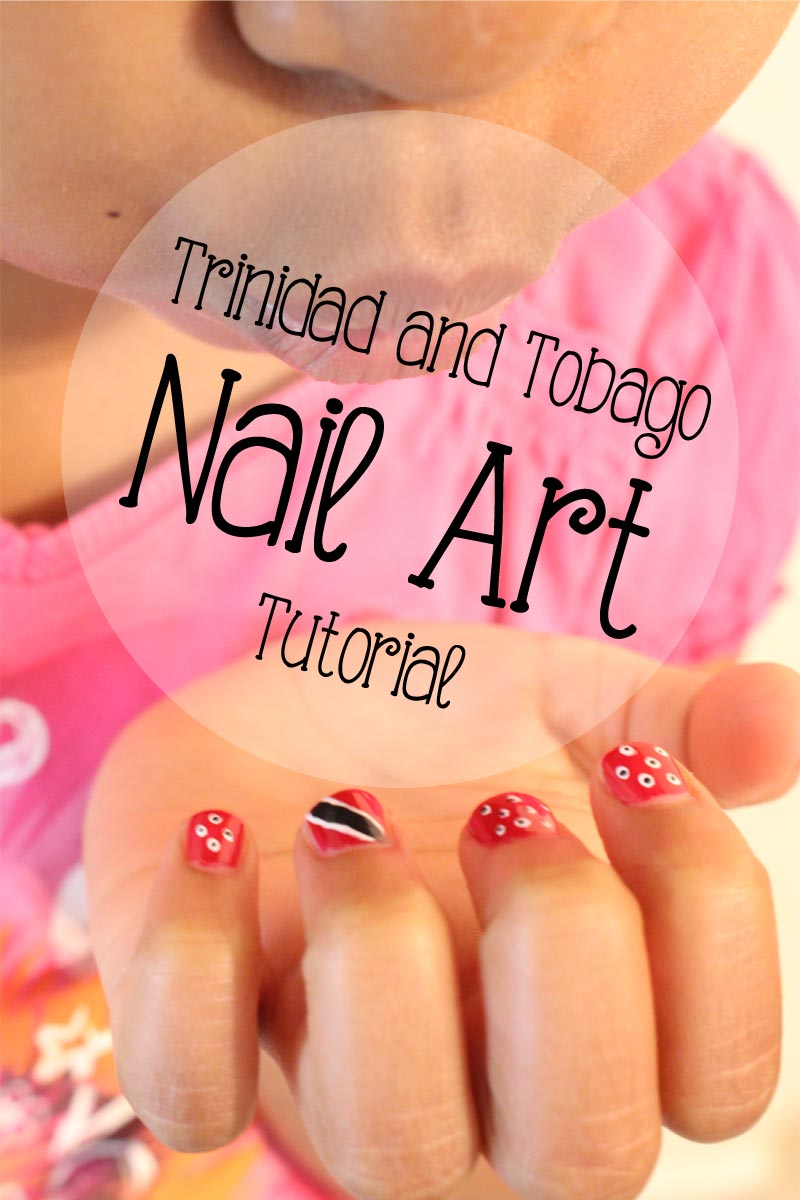
I’ll bet you didn’t know that I was a nail technician in a former life. Now that I have a little girl, I am back at it with these Caribbean flag nail art tutorials. For the flag of Trinidad, you’ll need base coat, red polish, white acrylic paint, black acrylic paint, and top coat. Acrylic paint comes in those little paint pots that you can get at any discount or craft store. You’ll need two paint brushes, one small, and one really small. Preferably with a point.
- Use a base coat so that the polish doesn’t stain the nails.
- Then add the red polish. Just one thin coat will do it. I don’t let my daughter wear polish on a regular basis, so this won’t be on long. Just for a special occasion. I’m not worried about it lasting more than 24 hours. Let the red polish dry completely.
- Use a small brush to add one stripe of white going from the top left corner to the bottom right. whether she’s looking at it or you are looking at it, it will look right, so don’t worry. A brush with a straight edge will make it easier.
- I use acrylic paint for designs because if I use nail polish for the design and make a mistake, I have to remove it with nail polish remover and it makes a big mess. Acrylic paint is water soluble, and if I make a mistake, I can wipe it off with a wet cloth without disturbing the nail polish underneath.
- Add one stripe of black paint down the middle of the white one . This is tricky on small nails, so that is why you need the smaller brush with the bristles that come to a point.
- To decorate the other nails, you can make more flags, or you can add polka dots. I added white dots on the rest of the nails, then came back with and added a little black dot to the center. You can do whatever you like.
- After you are finished, let the acrylic paint dry fully so that when you add the top coat, it doesn’t run. Don’t press down hard when you add the top coat, just brush over the nails lightly so that you don’t disturb the design. The top coat is to keep the design in place since the acrylic paint is water soluble, and to give it some shine.
Stay tuned for more Caribbean kids nail art tutorials.
This post is included in the Blogging While Brown & Rewind and Come Again’s 2014 June Blog Carnival celebrating National Caribbean-American Heritage Month.


